
David Yang
Tips and posts for iOS developers from an iOS developer.
Simple HUD with Swift Protocols
Call them HUD, spinner, loading indicator or loading view…
This article is about building and implementing your own and simple HUD and activity indicators with Swift protocol.
Why, when and where do you need it?
You have a wonderful app. The user is doing something on your app that requires an asynchronous task or is computing data and it just needs time. You need to display something indicating your app is doing something.
And this can happen on different levels:
- on the whole screen (a view controller’s main view)
- on multiple or single graphical components (eg: a child view controller’s view, custom views/cells, any other subviews)
What you could do…
You could chose to integrate a dependency that does this very well: MBProgressHUD, SVProgressHUD, PKHUD, JGProgressHUD… anythingHUD.
But even if those libraries do really well what they’re made for, you might just want to do your own (for many reasons) or being able to do more than just display a big giant HUD on the entire screen of your app when only some parts of your UI are affected.
What you can do with Swift protocols
In our use case, with a Swift protocol you’ll be able to define the behavior of any of your component when it is related to a loadable content.
Let’s start step by step.
First, let’s define a Loadable protocol.
protocol Loadable {
    func showLoadingView()
    func hideLoadingView()
}
Pretty simple. Any class conforming to the Loadable protocol will have to implement these two methods.
In the following examples, we will define the behavior of our Loadable protocol for some components your already familiar with.
UIViewController
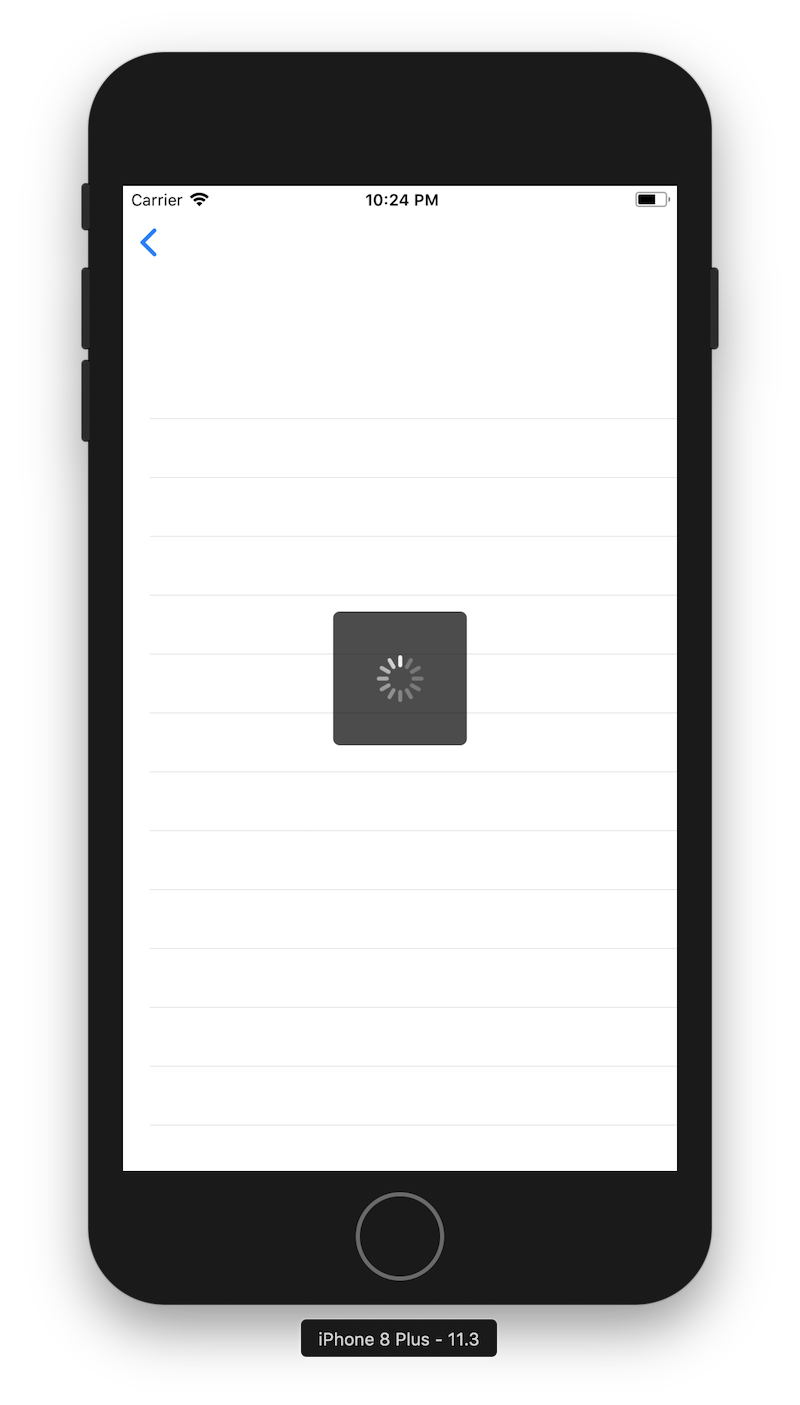
You’re on a screen of your app, a UIViewController. You are performing a short but time consuming task (eg: loading remote data). You want to display a HUD on your screen.
To begin with, we need to define a custom view for our HUD that we will simply call LoadingView.
In my implementation, it will be a view with a translucent black background, rounded corners and will contain a UIActivityIndicatorView in its center.
final class LoadingView: UIView {
    private let activityIndicatorView = UIActivityIndicatorView(activityIndicatorStyle: .whiteLarge)

    override func layoutSubviews() {
        super.layoutSubviews()

        backgroundColor = UIColor.black.withAlphaComponent(0.7)
        layer.cornerRadius = 5

        if activityIndicatorView.superview == nil {
            addSubview(activityIndicatorView)

            activityIndicatorView.translatesAutoresizingMaskIntoConstraints = false
            activityIndicatorView.centerXAnchor.constraint(equalTo: centerXAnchor).isActive = true
            activityIndicatorView.centerYAnchor.constraint(equalTo: centerYAnchor).isActive = true
            activityIndicatorView.startAnimating()
        }
    }

    public func animate() {
        activityIndicatorView.startAnimating()
    }
}
Now, we can define the default Loadable implementation for UIViewController that will display our LoadingView.
What’s nice with Swift protocol is that we can write the implementation of Loadable for any UIViewController outside of this latter. In other words, we don’t have to write the implementation of Loadable in an extension of our UIViewController or its subclasses, we just have to make sure our UIViewController and/or its subclasses conforms to Loadable and put its implementation in a protocol extension.
fileprivate struct Constants {
    /// an arbitrary tag id for the loading view, so it can be retrieved later without keeping a reference to it
    fileprivate static let loadingViewTag = 1234
}

/// Default implementation for UIViewController
extension Loadable where Self: UIViewController {

    func showLoadingView() {
        let loadingView = LoadingView()
        view.addSubview(loadingView)

        loadingView.translatesAutoresizingMaskIntoConstraints = false
        loadingView.widthAnchor.constraint(equalToConstant: 100).isActive = true
        loadingView.heightAnchor.constraint(equalToConstant: 100).isActive = true
        loadingView.centerXAnchor.constraint(equalTo: view.centerXAnchor).isActive = true
        loadingView.centerYAnchor.constraint(equalTo: view.centerYAnchor).isActive = true
        loadingView.animate()

        loadingView.tag = Constants.loadingViewTag
    }

    func hideLoadingView() {
        view.subviews.forEach { subview in
            if subview.tag == Constants.loadingViewTag {
                subview.removeFromSuperview()
            }
        }
    }
}
Done! Any UIViewController or its subclasses can now show or hide a LoadingView! 🎉
Here is a sample code example:
class MyViewController: UIViewController, Loadable {
    override func viewDidAppear(_ animated: Bool) {
        super.viewDidAppear(animated)

        showLoadingView()
        DispatchQueue.main.asyncAfter(deadline: DispatchTime.now() + .seconds(3)) {
            /// ... 3 seconds later
            self.hideLoadingView()
        }
    }
}
UITableViewCell
Now let’s say you have a UITableView with a list of items. When you tap on a row, you want to fetch data before doing any other action (eg: presenting or pushing a new screen).
Your task can take a few seconds and you don’t want your interface to appear frozen. So you need to display a UIActivityIndicatorView for the selected cell only.
Since it’s a UITableViewCell, we can do it by simply setting an instance of UIActivityIndicatorView as our cell’s accessory view.
Which is exactly what we’ll be doing in the following example.
final public class CustomTableViewCell: UITableViewCell { }

extension CustomTableViewCell: Loadable {
    func showLoadingView() {
        let activityIndicatorView = UIActivityIndicatorView(activityIndicatorStyle: .gray)
        accessoryView = activityIndicatorView
        activityIndicatorView.startAnimating()
    }

    func hideLoadingView() {
        accessoryView = nil
    }
}
Easy peasy!
Our CustomTableViewCell now conforms to Loadable and implements its methods.
Just call showLoadingView() whenever needed and the cell will display a native activity indicator view in its accessory view area.

To go further…
We did it with a UIViewController and a UITableViewCell. It can easily be done with any custom views.
In our examples, we could have done even cleaner by:
- implementing the default
Loadablebehaviors for UIView and changing the implementation for UIViewController so it will call its view’sLoadableprotocol implementation - chosing to call an external dependency (MBProgressHUD or anything that looks like it) as the default implementation for UIViewController
… and beyond
The great thing with a protocol is that it can be related to anything… What about ARKit?
 Image via Sony Pictures
But I’ll leave you here. 😄
Conclusion
To make it short, you may have custom views that display loadable content and behave in their own ways. To make things clean, you can make them conform to your own Loadable protocol and implement its behaviors.
Adopt Swift protocols!
And congratulations! If you got here safe, you just started playing with Protocol-oriented Programming! 😉