
David Yang
Tips and posts for iOS developers from an iOS developer.
Machine Learning and Apple - Pokédex: Gotta Learn 'Em All!
Apple introduced some really nice features with Machine Learning and made it accessible and easy to understand to all developers. This article will introduce you to CoreML and Create ML and how to build a Pokédex!
This article is actually based on a Cocoaheads meetup talk I gave in Montpellier, France on January 17th, 2019. The slides are available here (french only).
What is Machine Learning?
Let’s just start with what Wikipedia says about it.
Machine learning (ML) is the scientific study of algorithms and statistical models that computer systems use to progressively improve their performance on a specific task. Machine learning algorithms build a mathematical model of sample data, known as “training data”, in order to make predictions or decisions without being explicitly programmed to perform the task.
Source: Machine Learning on Wikipedia
To make it simple
With Machine Learning, you’ll just show your model a lot of data, tell it what is what so it can train and tell them apart. And then, by showing some new data to your model, it will be able to tell you what it is or make predictions, based on what it learned from your data.
The power with this approach is that you will not have to program anything to make your predictions.
ML Introduction by Apple
During WWDC17, Apple introduced CoreML to developers. Basically, CoreML enables us to use some ML models made by different frameworks (Caffee, Keras, Scikit…). In order to use them with CoreML, Apple provided some Python open-source tools for conversion (available here).
But ML in Apple systems just leveled-up at WWDC18 when they introduced Create ML : some tools that enables us to build our own ML models easily, without having to dive in complex ML tools.
Enough with history, let’s start working on a simple ML model and an actual app.
Pokédex: Gotta Learn ‘em All
By following the course of this article with me, you will build an app that will be able to classify a Pokémon picture (either from our Photo Library or from the Live Camera feed) : a Pokédex.
Just in case, here’s what it is:
The Pokédex (ポケモン図鑑 Pokémon Zukan, lit. “Pokémon Encyclopedia”) is an electronic device designed to catalog and provide information regarding the various species of Pokémon.
Building our ML model
In this part, we will use Create ML to build our ML model, which will help us classify the Pokémon pictures.
For my Pokédex, I’ll just train my model with two Pokémon: the fan-favorite Pikachu and the awesome Charizard.
The basics
Back to some theory and how to train your image classfier model.
Conceiving a model requires you to follow a simple cycle.
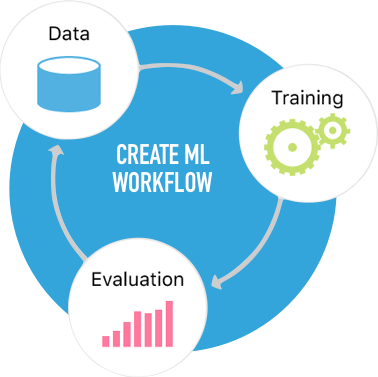
- You need data…
- … to train your model in classifying images.
- Then, you test your model by evaluating its accuracy with another set of data.
- Repeat as much as needed until you have satisfying results. The more data you have, the more accurate your model will be.
In practice
Let’s apply those steps with our Pokédex.
Step 1: The data
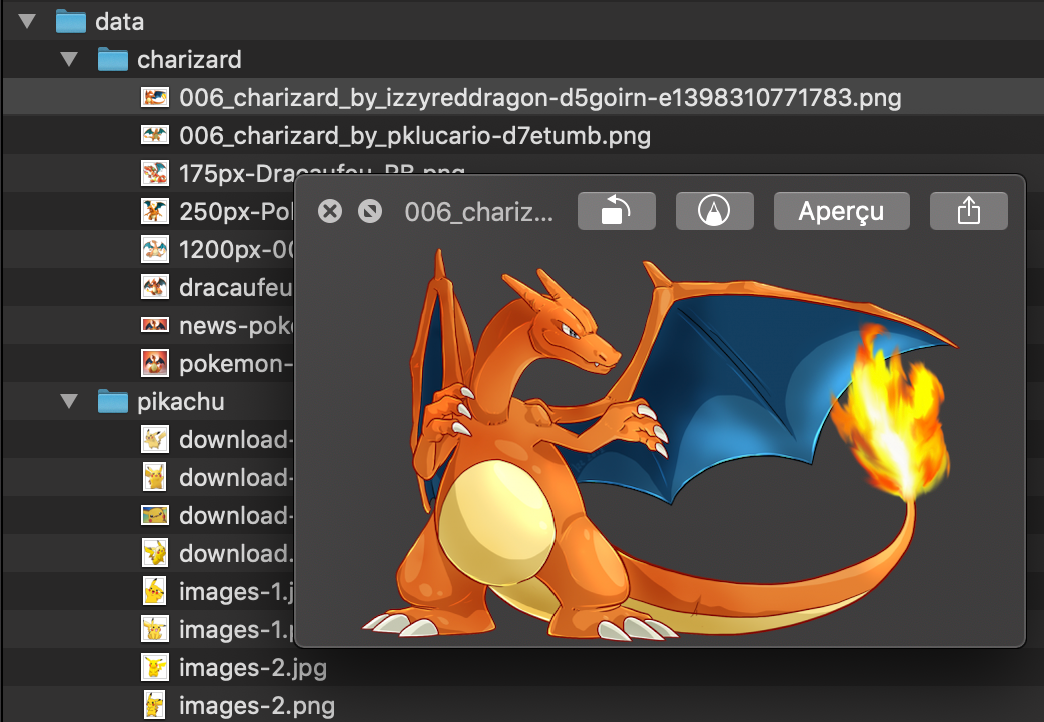
We need two sets of data.
- a training data set: a
datafolder with subfolderspikachuandcharizardcontaining pictures of each of them.
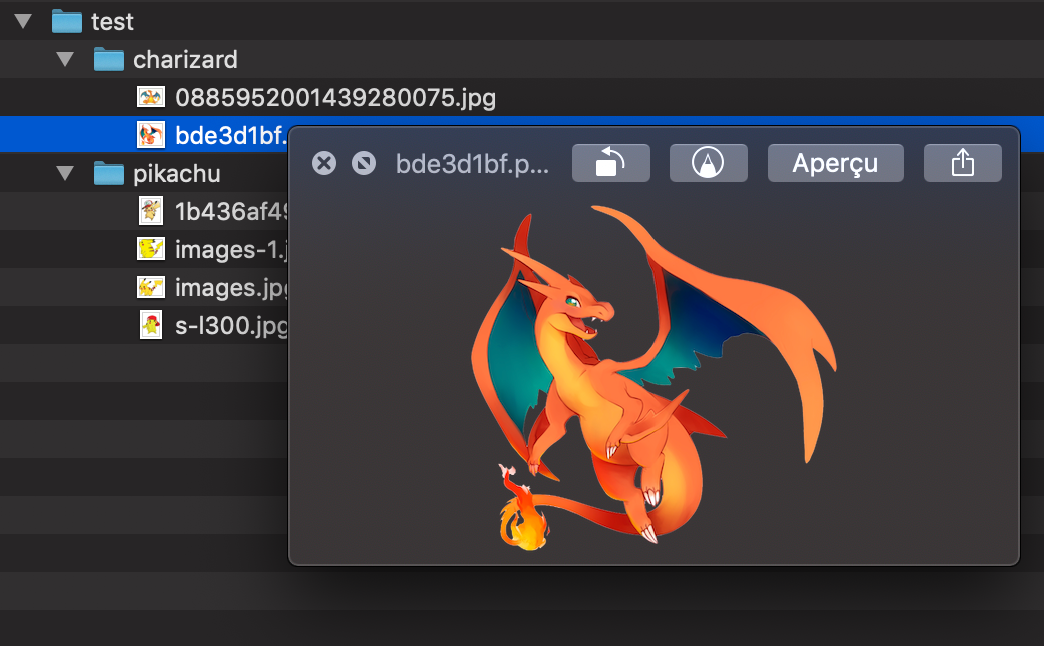
- an evaluation data set: a
testfolder in my case, with the same subfolder structure but containing pictures that were not in the training data set. This is important because we want to make sure the training data was efficient and our trained model is accurate.
Step 2: Training our model
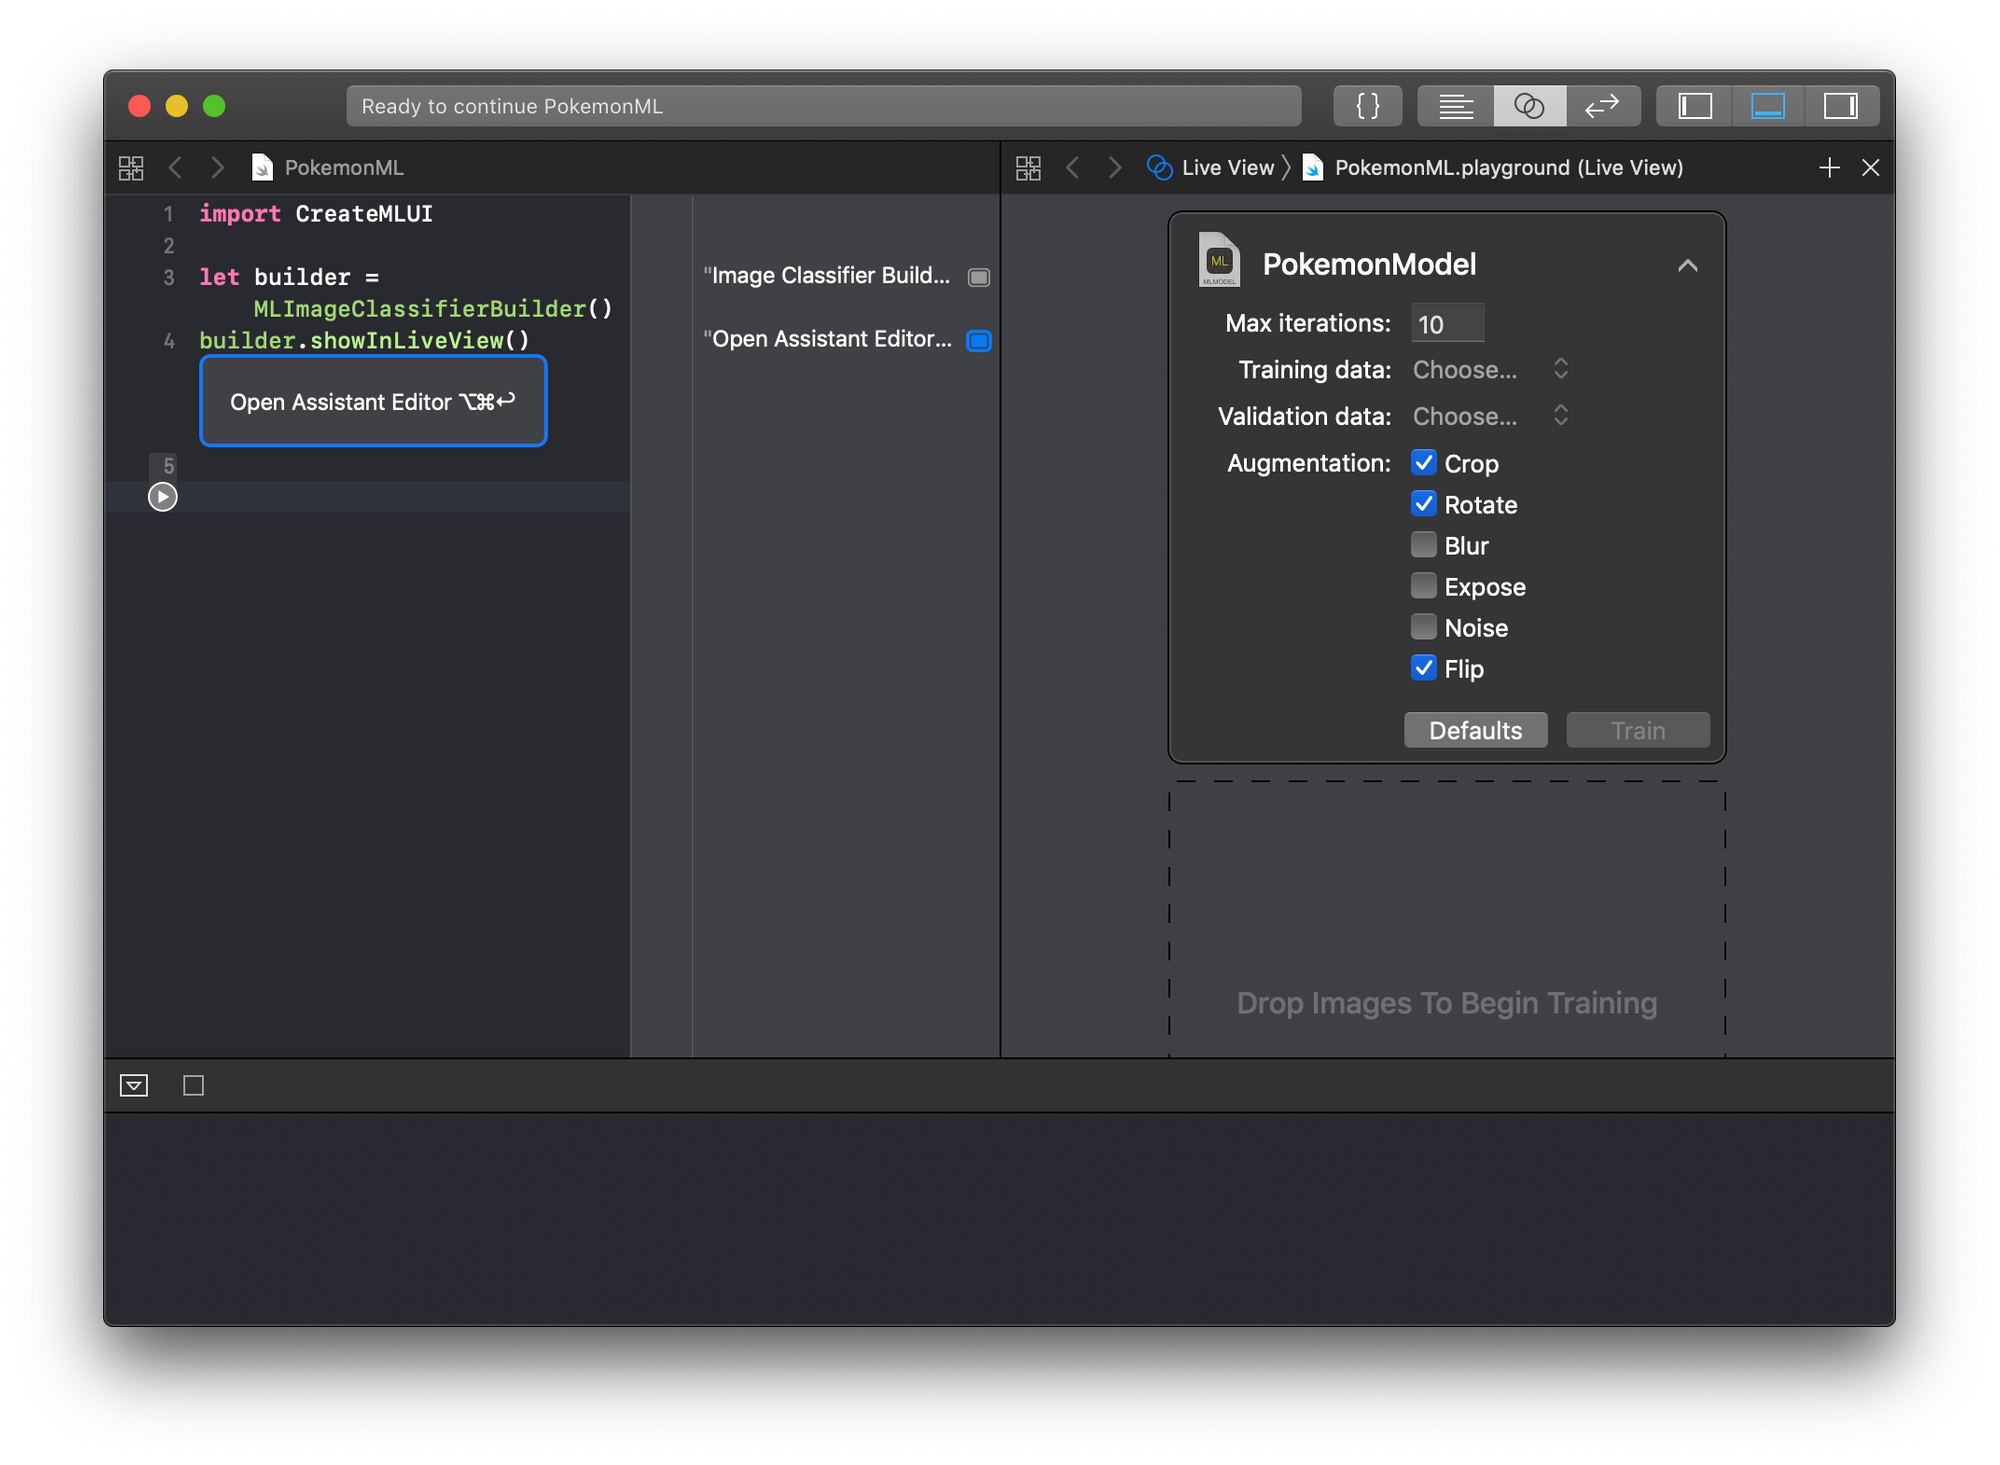
To create our model, we will need an Xcode Playground with the following code. Be careful, macOS Mojave is required.
import CreateMLUI

let builder = MLImageClassifierBuilder()
builder.showInLiveView()
Just run and open the Assistant Editor as Xcode will suggest. Rename the Image Classifier to PokemonModel (this will be the name of our mlmodel output file and our model class) and drag your data folder from your Finder into it.
As a result, you’ll have a PokemonModel trained with those data.
Create ML training demo
Step 3: Evaluating our model
Just like in the previous step, just drag and drop your test folder from your Finder into Xcode’s Image Classifier Assistant Editor.
Our trained model will be evaluated with the test data and the accuracy will be displayed.
Create ML evaluating demo
Step 4: Repeat the previous steps…
… as much as needed and as long as you don’t get a satisfying evaluation success rate.
Remember, the more data you have, the more accurate your model will be.
As such, it may be good to know that when lacking data or if you want to generate more data with your current training data set, you can play with options such as the number of iterations or insert new data with some image transformation (rotation, flip, crop, exposure, noise…).
Note: You should be careful when tweaking these options. For example, if you’re training an OCR model (character recognition), you will not want to apply transformation such as rotation or flip to your training data, otherwise your model could end up mistaking a “2” for a “5” or a “6” for a “9”.
For the next part of this article, we’ll just consume our newly created model with CoreML. When you are ready, just save your PokemonModel.mlmodel file so we can use it in an app.
Using our ML model in our app
I will present two different approaches to use our ML model. One simply by instantiating the PokemonModel class and using its prediction method, the other one with a more complex setup involving Vision Framework and predictions with a live video feed from the device’s camera.
But for both, you will first need to import the PokemonModel.mlmodel created in the previously.
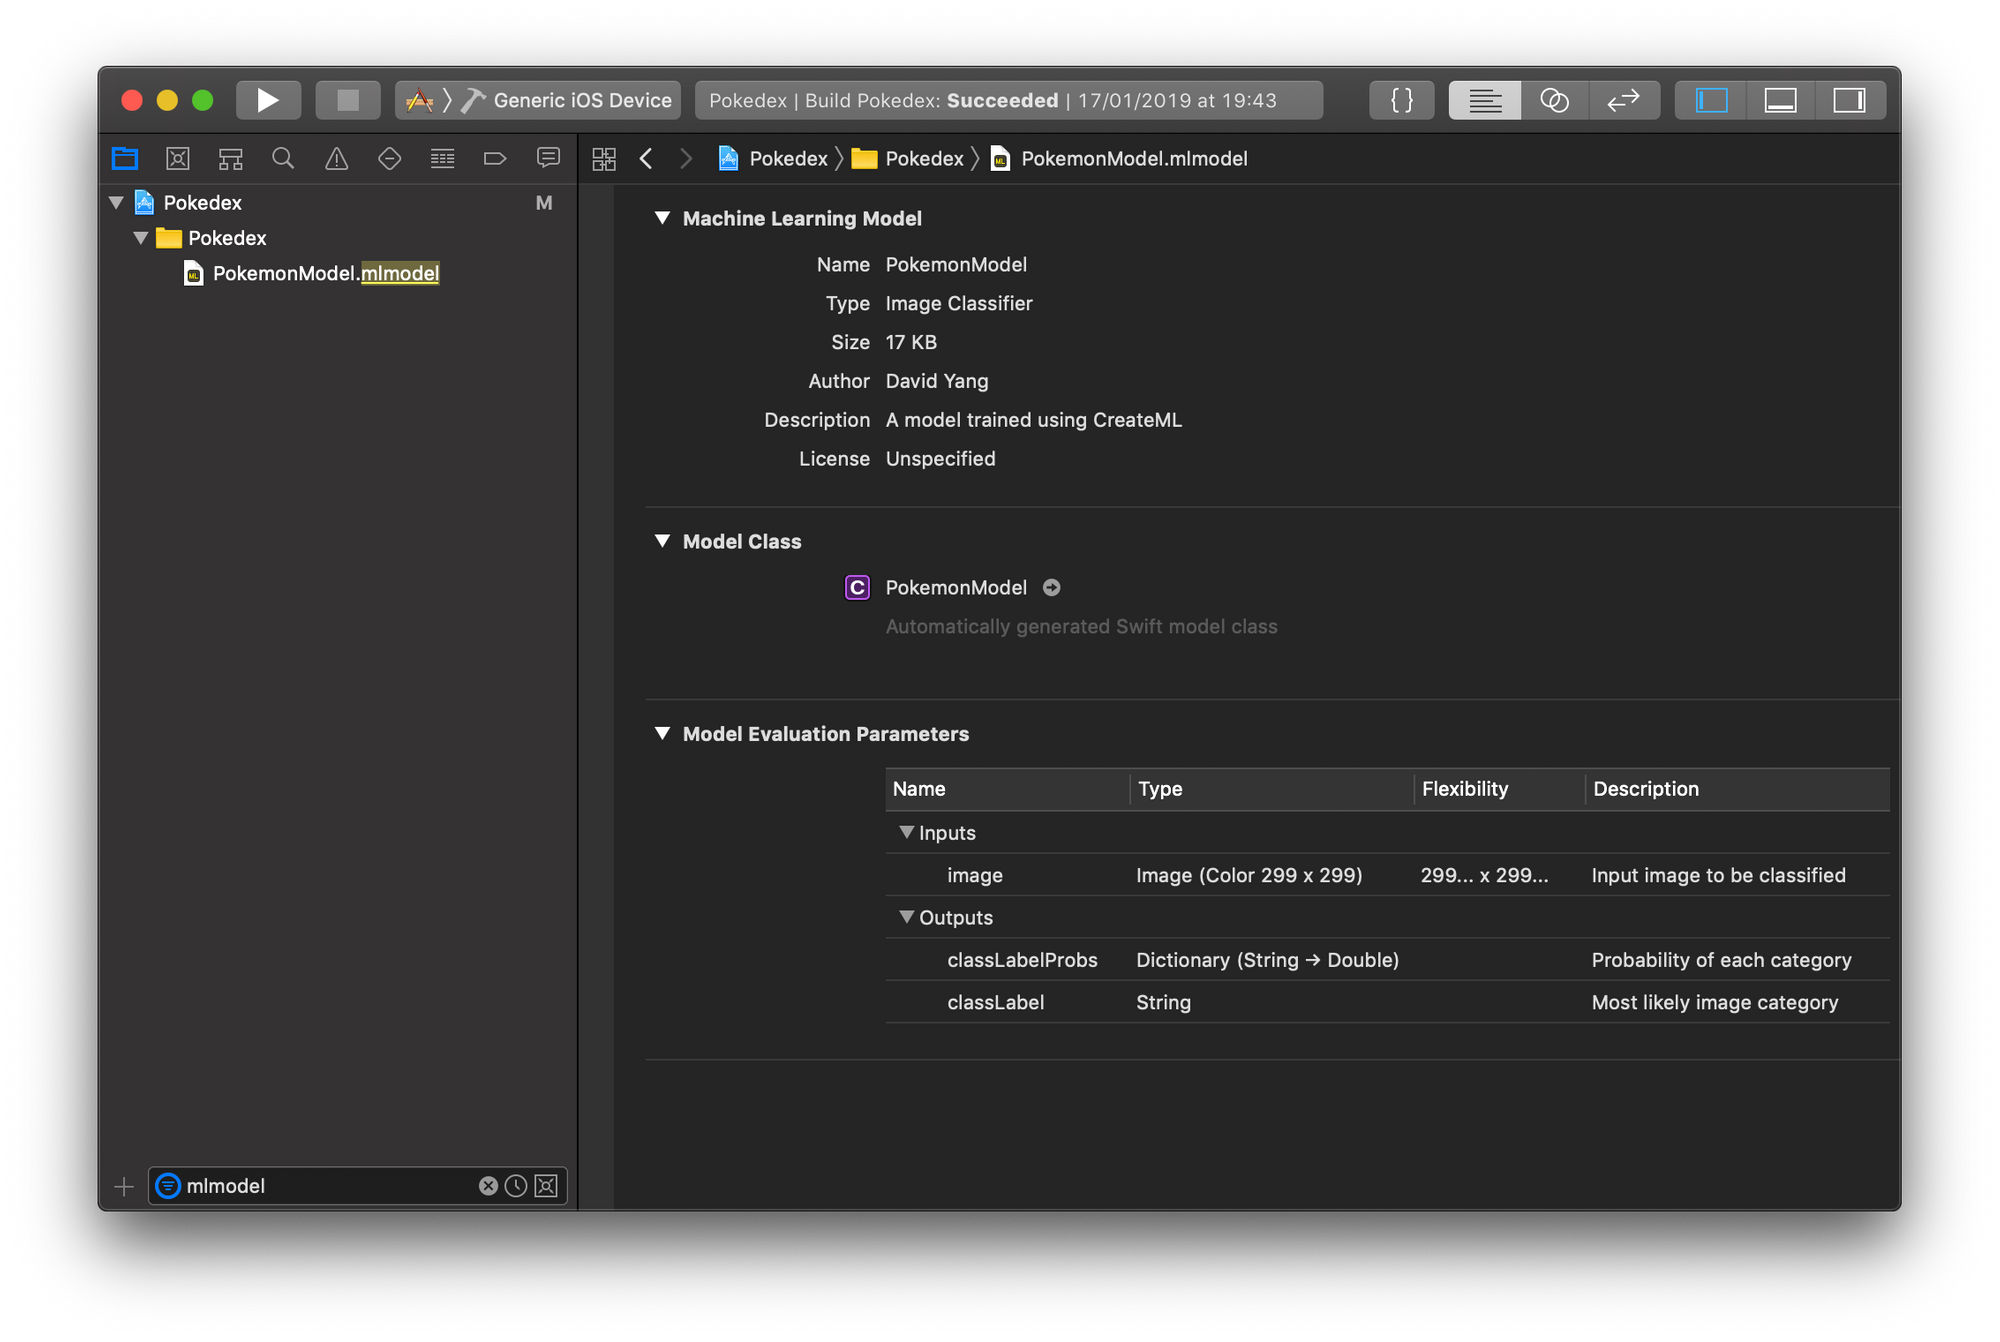
In Xcode, you can learn more about the model and see that it only takes a 299x299 image as an input parameter and will output:
- a
classLabel: the result of the prediction or the most likely image category (in our case, it will be eitherpikachuorcharizard). - a
classLabelProbs: a Dictionary containing all the prediction categories as keys and their probability.
The simple prediction way
First, it’s good to know that you won’t be able to use a UIImage directly as an input to your model:
- your picture needs to be 299x299, so it will have to be resized
- an mlmodel actually takes a
CVPixelBufferas an input, which means you will have to convert yourUIImage.
Here is a piece of code that will help you in these tasks.
import UIKit

extension UIImage {
    /// Rescale the image
    /// eg: myImage.scaleImage(newSize: CGSize(width: 299, height: 299))
    func scaleImage(newSize: CGSize) -> UIImage? {
        UIGraphicsBeginImageContextWithOptions(newSize, false, 0.0)
        self.draw(in: CGRect(x: 0, y: 0, width: newSize.width, height: newSize.height))
        let newImage = UIGraphicsGetImageFromCurrentImageContext()
        UIGraphicsEndImageContext()
        return newImage
    }

    /// Convert the image to a CVPixelBuffer?
    /// eg: myImage.buffer()
    func buffer() -> CVPixelBuffer? {
        var pixelBuffer: CVPixelBuffer? = nil

        let width = Int(self.size.width)
        let height = Int(self.size.height)

        let attrs = [kCVPixelBufferCGImageCompatibilityKey: kCFBooleanTrue, kCVPixelBufferCGBitmapContextCompatibilityKey: kCFBooleanTrue] as CFDictionary
        CVPixelBufferCreate(kCFAllocatorDefault, width, height, kCVPixelFormatType_32ARGB, attrs, &pixelBuffer)
        CVPixelBufferLockBaseAddress(pixelBuffer!, CVPixelBufferLockFlags(rawValue:0))

        let colorspace = CGColorSpaceCreateDeviceRGB()
        let bitmapContext = CGContext(data: CVPixelBufferGetBaseAddress(pixelBuffer!), width: width, height: height, bitsPerComponent: 8, bytesPerRow: CVPixelBufferGetBytesPerRow(pixelBuffer!), space: colorspace, bitmapInfo: CGImageAlphaInfo.noneSkipFirst.rawValue)!

        bitmapContext.draw(self.cgImage!, in: CGRect(x: 0, y: 0, width: width, height: height))

        return pixelBuffer
    }
}
Then in code, to make the prediction with from given image, just do:
if let rescaledImage = image.scaleImage(newSize: CGSize(width: 299, height: 299)),
   let imagePixelBuffer = rescaledImage.buffer(),
   let prediction = try? model.prediction(image: imagePixelBuffer)  {
    let predictedValue = prediction.classLabel
    let predictedProb = prediction.classLabelProbs[predictedValue]!

    let resultText = "\(predictedValue): \(round(predictedProb * 100))%"
    print(resultText)
}
Output:
pikachu: 98%
With Vision Framework
With a relatively more complex setup, you can also get fast results with a live video feed from your camera.
The interesting part of the code will be the following methods:
extension CameraViewController {
    @discardableResult
    func setupVision() -> NSError? {
        // Setup Vision parts
        let error: NSError! = nil

        do {
            let visionModel = try VNCoreMLModel(for: PokemonModel().model)
            let objectRecognition = VNCoreMLRequest(model: visionModel, completionHandler: { (request, error) in
                DispatchQueue.main.async(execute: {
                    // perform all the UI updates on the main queue
                    if let results = request.results as? [VNClassificationObservation] {
                        self.showResults(results)
                    }
                })
            })
            self.requests = [objectRecognition]
        } catch let error as NSError {
            print("Model loading went wrong: \(error)")
        }

        return error
    }

    func captureOutput(_ output: AVCaptureOutput, didOutput sampleBuffer: CMSampleBuffer, from connection: AVCaptureConnection) {
        guard let pixelBuffer = CMSampleBufferGetImageBuffer(sampleBuffer) else {
            return
        }

        let exifOrientation = exifOrientationFromDeviceOrientation()

        let imageRequestHandler = VNImageRequestHandler(cvPixelBuffer: pixelBuffer, orientation: exifOrientation, options: [:])
        do {
            try imageRequestHandler.perform(self.requests)
        } catch {
            print(error)
        }
    }

    func showResults(_ results: [VNClassificationObservation]) {
        let bestResult = results.sorted { (first, second) -> Bool in
            first.confidence > second.confidence
        }
        guard let result = bestResult.first else { return }
        let resultText = "\(result.identifier): \(roundf(result.confidence * 100))%\n"
        self.resultLabel.text = resultText
    }
}
For the full code, please refer to the Github repo for my demo app available in the Links section of this article.
As you can see:
- a
VNCoreModelis setup with thePokemonModelclass - a
VNCoreMLRequestis created and stored in arequestsproperty from our UIViewController - we convert the images from our live video feed to a
CVImageBuffer(which is actually an alias to theCVPixelBuffertype) and perform our previousVNCoreMLRequestwith them. - we display the results on a UILabel on the screen.
Demo
Now, let’s just take a look at the demo.

You will notice that:
- the second Pikachu picture I provided from my Photo Library had a pretty bad prediction result. To increase that result, I will need to provide more data to train my model or play with some options during its training: cropping, rotating or flipping the image so I can train my model with more data.
- even if Charmander looks like a Charizard, the
PokemonModelwas confident enough in not mistaking it to a Charizard and its prediction result was pretty low. - the weird Pikachu/Homer Simpson picture was not mistaken to a Pikachu! 💪
Create ML and CoreML limitations
Although impressive, we still need to consider the following things when designing a CoreML based app:
- A shipped CoreML model in an app can not be trained on a device. To improve it, you will have to train it with more data, create a new model and update your app.
- Apple introduced CoreML and continuous training (without the need to submit an update of your app) with IBM Watson. Learn more about it here.
- Create ML is great for introduction to Machine Learning and is easy to setup on Apple systems, but it only works on Apple platforms. For cross-platform solution, you should consider tools like Tensorflow.
To conclude
Machine Learning may have been introduced to us developers less than 2 years ago, but it already allows us to do some impressive things.
No doubt Apple will work on improving it.
In the meantime, it’s already available on Apple devices in a lot of features:
- Siri Suggestions
- Camera Tracking
- Handwriting recongnition on Apple Wath
- Face Recognition on Photos
- Credit Card scanner from the Camera
- many more…
TL;DR
I started making a Pokédex with Create ML and CoreML and I told you how.
Links
Demo Playground and Xcode project source-code are available here: https://github.com/davidy4ng/CocoaheadsMtp-ML-Apple-Pokedex